M5Stack Tab5 as a Home Assistant display
The tablet the project was born for: a 5-inch 1280 × 720 touch screen built around an ESP32-P4. M5Stack has made it with three different display chips; the firmware exists for all three.
- Screen
- 5", 1280 × 720
- Processor
- ESP32-P4
- Memory
- 32 MB PSRAM, 16 MB flash
- Radio
- ESP32-C6, Wi-Fi 6, BLE 5
- Display versions
- 3
The three versions of the Tab5
M5Stack has changed the chip driving the screen and touch several times. Each needs its own firmware: they are not interchangeable. The install page asks you to pick yours.
ST7123
Made from 14 October 2025 to 28 April 2026. Display and touch in a single chip.
Supported: the version the project was developed and checked on, until my tablet failed on 11 October 2026. It is the default; the 3.9.1 firmware has not run on a device yet.
ST7121
Made since 28 April 2026. Display and touch in a single chip.
Runs for a user since October 2026 (display, touch and wake word); also installed on my second tablet on 21 October 2026.
ILI9881C
The original version, made from 9 May to 14 October 2025, with a separate GT911 touch chip.
Builds, never tried: the firmware is built on every change, but nobody has run it on this version yet.
How to tell which one you have: the display chip is printed on the sticker on the back, just above the Espressif logo. Beware, a unit labelled "ST7123" may carry an ST7121: if unsure, try one firmware then the other.
Have an ST7121 or an ILI9881C and willing to try? Tell how it went in the hardware compatibility Discussions: that is what moves these versions forward.
The ESPHome configuration
To start from scratch with ESPHome on the Tab5: a short, complete example that brings up the display, the touch, Wi-Fi and the backlight, shows a Home Assistant temperature and turns a light on. Pick your tablet's chip at the top of the file, then replace the two entities with your own.
# M5Stack Tab5 with ESPHome and Home Assistant: display, touch, Wi-Fi and backlight, a Home
# Assistant temperature in the middle and a button that turns a light on. Pins and settings of
# the "Home Assistant display" firmware (3.9.0), which runs on the tablet; this example itself
# is compiled with ESPHome 2026.9.1 but not tried as is.
substitutions:
  # The display chip is printed on the back of the Tab5, above the Espressif logo:
  #   ST7123   : M5STACK-TAB5-ST7123, touch st7123, 100ms
  #   ST7121   : M5STACK-TAB5-ST7121, touch st7123, 100ms
  #   ILI9881C : M5STACK-TAB5,        touch gt911,  never
  panel_model: M5STACK-TAB5-ST7123
  touch_chip: st7123
  touch_interval: 100ms

esphome:
  name: tab5
  friendly_name: Tab5
  min_version: 2026.9.0
  on_boot:
    # The panel reset goes through a PI4IOE5V6408 I/O expander, which needs a second after
    # start-up: without this wait, black screen after a software restart. A C delay(): ESPHome's
    # "delay:" does not hold the display setup back.
    - priority: 700
      then:
        - lambda: "delay(1000);"

esp32:
  board: esp32-p4-evboard
  flash_size: 16MB
  framework:
    type: esp-idf
    advanced:
      enable_idf_experimental_features: true
      execute_from_psram: true

# 32 MB of PSRAM, where LVGL keeps the whole picture (buffer_size: 100% below).
psram:
  mode: hex
  speed: 200MHz

# Wi-Fi is on a second chip, an ESP32-C6, linked over SDIO. Its reset is active high:
# active_high: false gives "sdmmc_card_init failed".
esp32_hosted:
  variant: esp32c6
  active_high: true
  clk_pin: GPIO12
  cmd_pin: GPIO13
  d0_pin: GPIO11
  d1_pin: GPIO10
  d2_pin: GPIO9
  d3_pin: GPIO8
  reset_pin: GPIO15
  slot: 1
  sdio_frequency: 20MHz
  use_psram: true

wifi:
  ssid: !secret wifi_ssid
  password: !secret wifi_password
  ap:
    ssid: "Tab5 fallback"

captive_portal:

api:
  encryption:
    key: !secret api_encryption_key
  # With no Home Assistant connected, ESPHome restarts after 15 min by default.
  reboot_timeout: 60min

ota:
  - platform: esphome

logger:
  hardware_uart: USB_SERIAL_JTAG

# One I2C bus for the touch, the two I/O expanders and the audio chips.
i2c:
  - id: bsp_bus
    sda: GPIO31
    scl: GPIO32
    frequency: 400kHz

pi4ioe5v6408:
  - id: pi4ioe1
    address: 0x43
  - id: pi4ioe2
    address: 0x44

# Power rails behind the expanders. "wifi_power" feeds the ESP32-C6: the expander starts off,
# and without this the Wi-Fi never comes up ("sdmmc_card_init failed"). The charger stays off,
# as with no battery.
switch:
  - platform: gpio
    id: wifi_power
    pin:
      pi4ioe5v6408: pi4ioe2
      number: 0
    restore_mode: ALWAYS_ON
  - platform: gpio
    id: usb_5v_power
    pin:
      pi4ioe5v6408: pi4ioe2
      number: 3
    restore_mode: ALWAYS_ON
  - platform: gpio
    id: external_5v_power
    pin:
      pi4ioe5v6408: pi4ioe1
      number: 2
    restore_mode: ALWAYS_ON
  - platform: gpio
    id: charge_enable
    pin:
      pi4ioe5v6408: pi4ioe2
      number: 7
    restore_mode: ALWAYS_OFF

# Supply of the display's MIPI-DSI link: LDO 3 at 2.5 V.
esp_ldo:
  - voltage: 2.5V
    channel: 3

# The panel is portrait (720 × 1280): LVGL turns it to landscape below.
display:
  - id: panel
    platform: mipi_dsi
    model: ${panel_model}
    dimensions:
      width: 720
      height: 1280
    reset_pin:
      pi4ioe5v6408: pi4ioe1
      number: 4
    pixel_mode: 16bit
    color_order: RGB
    update_interval: never
    auto_clear_enabled: false

# Same pins on the three versions. No mirroring (it corrupts the picture on an ST7121): LVGL
# turns the touches with the picture.
touchscreen:
  - id: touch
    platform: ${touch_chip}
    update_interval: ${touch_interval}
    interrupt_pin: GPIO23
    reset_pin:
      pi4ioe5v6408: pi4ioe1
      number: 5
    calibration:
      x_min: 0
      x_max: 720
      y_min: 0
      y_max: 1280

output:
  - platform: ledc
    id: backlight_pwm
    pin: GPIO22
    frequency: 1000Hz

light:
  - platform: monochromatic
    id: backlight
    name: "Backlight"
    output: backlight_pwm
    restore_mode: RESTORE_DEFAULT_ON

# Replace with your own entities. For the button, tick "Allow the device to perform Home
# Assistant actions" in Home Assistant (options of the ESPHome device).
sensor:
  - platform: homeassistant
    id: living_room_temperature
    entity_id: sensor.living_room_temperature
    on_value:
      - lvgl.label.update:
          id: temperature_label
          text:
            format: "%.1f °C"
            args: [x]

# LVGL's built-in fonts have no accented letters: Roboto, downloaded at build time (it only
# lacks combining accents, hence ignore_missing_glyphs).
font:
  - file: "gfonts://Roboto"
    id: font_text
    size: 32
    glyphsets: [GF_Latin_Core]
    ignore_missing_glyphs: true
  - file: "gfonts://Roboto@700"
    id: font_big
    size: 80
    glyphsets: [GF_Latin_Core]
    ignore_missing_glyphs: true

lvgl:
  displays: [panel]
  touchscreens: [touch]
  rotation: 270
  color_depth: 16
  byte_order: little_endian
  buffer_size: 100%
  default_font: font_text
  pages:
    - id: home_page
      widgets:
        - label:
            id: temperature_label
            align: CENTER
            y: -80
            text: "--"
            text_font: font_big
        - button:
            align: CENTER
            y: 120
            width: 360
            height: 120
            widgets:
              - label:
                  align: CENTER
                  text: "Living room light"
            on_click:
              - homeassistant.action:
                  action: light.toggle
                  data:
                    entity_id: light.living_room
Validated and compiled with ESPHome 2026.9.1 on 2026-10-28, not tried as is on the tablet: its pins and settings are those of the full firmware, which runs on mine.
The settings that matter on this tablet
- The ESP32-C6, which carries the Wi-Fi, is powered through an I/O expander (PI4IOE5V6408, pin 0 of the second one): without the
wifi_powerswitch turned on at start-up, the SDIO link never comes up ("sdmmc_card_init failed"). Its reset, GPIO15, is active high. - The panel reset goes through the other expander, which needs a second after start-up: without the wait in
on_boot, black screen after a software restart. It has to block, hence the Cdelay(). - The panel is portrait (720 × 1280): LVGL turns it to landscape with
rotation: 270, and turns the touches with it. - No mirroring on the display or the touch: it corrupts the picture on an ST7121.
- The MIPI-DSI link is powered by LDO 3 of the ESP32-P4, at 2.5 V (
esp_ldo). - Home Assistant takes its time: with no API client, ESPHome restarts after 15 minutes by default, hence
reboot_timeout: 60min. For the button to act, allow the device to perform actions in its ESPHome options.
The full firmware keeps the hardware in tab5-hardware.yaml (sound, microphones, clock and battery included) and the display chip in one file per version (ecran-st7123.yaml, ecran-st7121.yaml, ecran-ili9881c.yaml). The same tablet without Home Assistant: Vigie on the Tab5.
On the real tablet
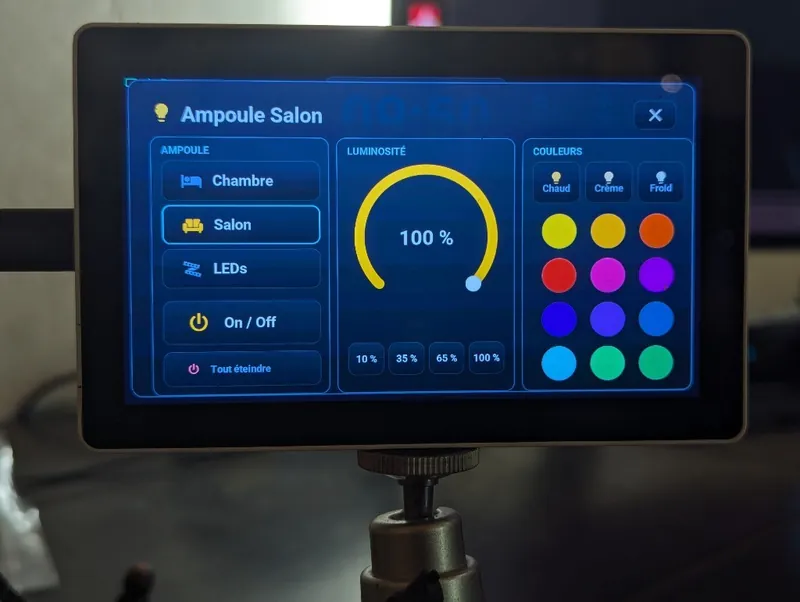
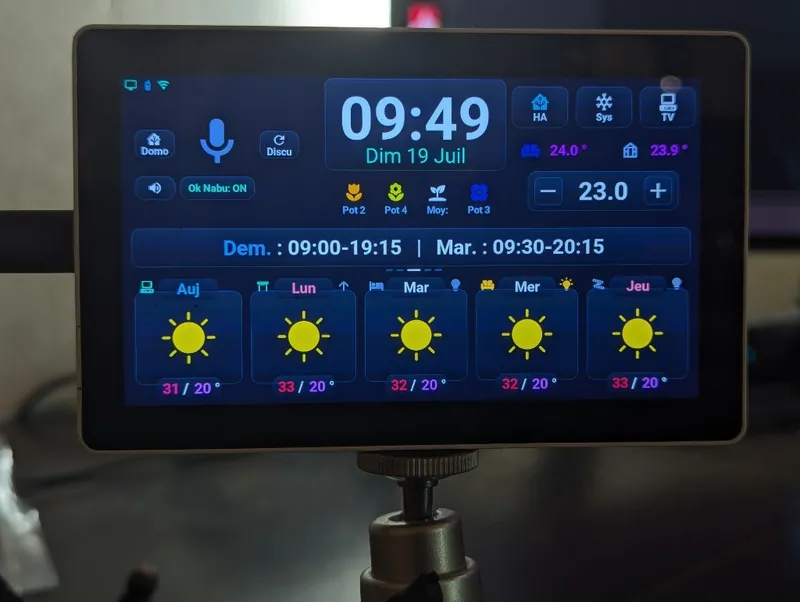
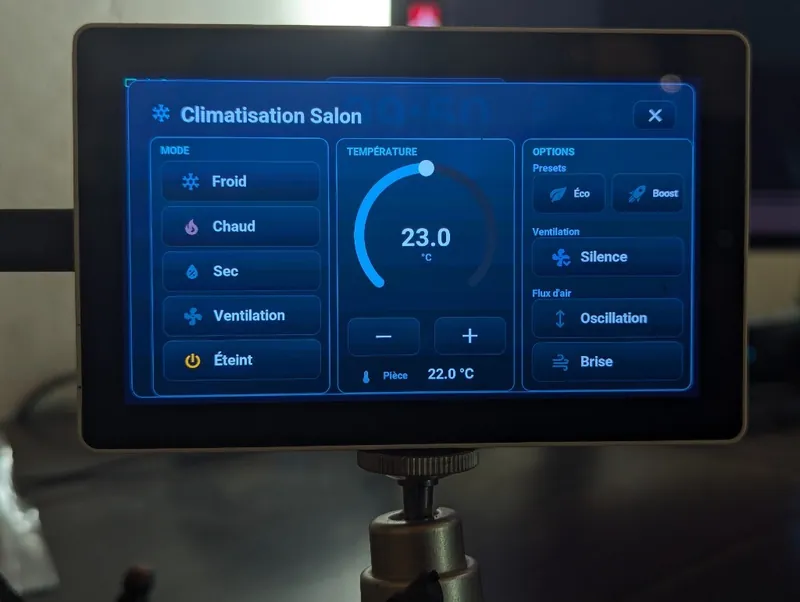
The screen texts in these photos are in French; the display speaks seven languages.
What is inside
- ESP32-P4: dual-core RISC-V processor running the whole firmware; 32 MB of PSRAM, essential to hold the 1280 × 720 image in memory, and 16 MB of flash.
- A separate ESP32-C6 for Wi-Fi 6 and Bluetooth 5, linked to the P4; transparent for ESPHome.
- Backed-up clock (RX8130CE): time and alarm are right from boot, before the network.
- Sound and microphones: an ES8388 converter for the speaker, an ES7210 for the wake-word microphones.
- Motion sensor, used by the games you play by tilting the tablet.
- Optional 2S lithium battery, with charger and voltage reading; the firmware turns the charger off when there is no battery or when the tablet gets hot.
Measured power draw at the USB input: 2.6 W with the screen at 100%, 1.7 W at 50%, 1.2 W with the screen off.
Install it
- Connect the tablet to a computer with a USB-C cable that carries data, and open the install page in Chrome or Edge.
- Pick your display version (ST7123, ST7121 or ILI9881C), install, then give it the Wi-Fi.
- Follow the Home Assistant steps: files, adding the device, weather sources, blueprint.
What the screen does once installed: the native Home Assistant display. Another board, bigger and cheaper: the Waveshare ESP32-P4 7B.